3 Ways to Use a Fiber Diz

A diz is a small tool used to make roving and combed top, or prepared fiber for handspinning. Dizzes have 1-3 holes in the center and come in many shapes and sizes (we sell our own button dizzes here on the Strauch website). 

3 Ways to Use a Fiber Diz

When you are combing fibers and preparing them to spin, a diz is the final step in the process. It creates uniformity in the fibers, and is easy to do once you get the hang of it! We prefer using a curved diz, although flat dizzes are also available. The size of the hole will determine the size of your roving, so you can experiment with a variety of dizzes to see which you prefer. 

With the concave size side towards you, use a threader or small crochet hook to start the fiber through the hole. Then, gently pull the fiber toward you while holding the diz steady against the teeth of the carder or combs. You should feel the fibers drafting a little as you work; continue to pull gently to avoid a break in the fiber so that you end up with a long, continuous roving! Here are our favorite video tutorials to get you started: 

Option #1: Diz roving off your drum carder


Option #2: Diz fibers off hackles or combs


Option #3:  Diz a batt


Be sure to share your projects with us on Instagram & don’t forget to tag your post with #strauchfiber! 

Like this post? Pin it!

3 Ways to Use a Fiber Diz

Posted in Carding, Fiber | Tagged , | Leave a comment

How to Maximize Your Next Drum Carding Session [FREE PRINTABLE]

Whether you’ve just gotten a big bag of fleece or need to stock your shop or fiber bin with beautiful batts, your perfect day of drum carding requires just a bit of planning to ensure maximum efficiency. Today, we share our best tips to help you save time before, during and after each carding session. Make sure to download our FREE CHECKLIST to keep your fiber prep on track – click here to sign up for our newsletter & download the PDF!

How to Maximize Your Next Drum Carding Session [FREE PRINTABLE]

BEFORE

Wash fiber. Wash and inspect all fibers ahead of time to ensure they are free of lanolin, grease, vegetable matter (VM), etc. In particular, lanolin and grease can cause damage to your drum carder. When in doubt, clean fibers again to make sure that any traces of lanolin or grease are removed (find tips cleaning fleece here). The amount of vegetable matter you remove is up to you, but keep in mind that the drum carding process does not remove VM – so anything that is in your fiber prior to processing is likely to show up in your batts. 

Clean drum. If you didn’t clean your drum after your last carding session (and especially if the fibers you want to card are a different color from those previously processed), use the doffer brush to remove any fibers (the proper technique is shown below; click here for instructions on this process). 

How to Maximize Your Next Drum Carding Session [FREE PRINTABLE]

Check machine parts. Do a quick check of your machine to make sure that there aren’t any parts that need to be tightened or replaced. Consult the owners manual for your model to get a list of what parts to keep an eye on.

DURING

Take frequent breaks. Take frequent breaks to stretch or sit down as needed to prevent muscle stiffness or even repetitive strain issues (especially if you have a manual carder). 

Keep work area clean. Fluff and fiber can end up everywhere once you start carding! Take care to keep fibers away from your drum carder – especially the handle that turns the large drum – so that they don’t get stuck in any of the moving parts. Clean off dust and debris from the infeed tray or pull-off board on our Petite model in between each batt – you’d be surprised at how much fluff can accrue while you work! 

AFTER

Clean your machine. This is an excellent habit to get into (and saves you time prior to your next carding session!). Not only do you want to remove any fibers that are stuck in the carding cloth of the large drum, you will also want to remove any second cuts, short fibers or neps that are stuck in the infeed drum. Finally, remove any fluff that has lodged in the drive mechanism. Click here for in-depth instructions for cleaning your carder.

Remove drive band. For most of our models, you don’t need to worry about this step – but if you have a Petite, make sure to remove the drive band once you are done carding. This will prevent it from getting stretched out over time and make it last longer! 

How to Maximize Your Next Drum Carding Session [FREE PRINTABLE]

Store away from children and pets. Make sure to keep your carder away from curious children or pets who could harm themselves on the sharp pins. While not essential, you can use a sheet or towel to keep dust off of your carder when not in use. 

Click here to download our drum carding checklist to make the most of your next fiber prep session; if you already get our emails, just enter the address you used to sign up to claim your free download.

Be sure to share your projects with us on Instagram & don’t forget to tag your post with #strauchfiber! 

Like this post? Pin it!

How to Maximize Your Next Drum Carding Session [FREE PRINTABLE]

Posted in Carding, Freebies | Tagged , | Leave a comment

Meet Our Makers: Charan Sachar of Creative with Clay

Since most fiber festivals and events are on hold until (at least) 2021, we’re delighted when folks tag us on social media to let us know how they’re enjoying their Strauch products. Over the summer, we started to notice a lot of inspiring batt projects shared by @CharanSachar. As we followed along, we discovered that amazing and colorful batts were just the tip of the iceberg – Charan is also a potter, knitter, spinner and weaver! Charan’s business, Creative With Clay, features exquisite handmade pottery pieces (many of which feature a knitted motif!) as well as handspun yarns and carded batts, handmade fiber tools such as orifice threaders and dizzes, and more!

We hope you enjoy getting to know Charan in today’s interview!

 Charan Sachar working with clay

Q: You do a lot of creative crafts – which one did you start with?

I was always a very crafty person growing up, drawing, painting, and working with my hands in every way possible. I would say my first absolute love for a craft was pottery. I was amazed at how a material like clay could be transformed into something functional like a mug and also a 15 foot doorway surround. 

Q: How do you juggle doing so many creative crafts at once? Do you make time for each daily, or have phases where you’re more into one than the other, and then switch gears?

I honestly work with the craft that feels right at the moment. Pottery is not just my craft but also my business, so that happens everyday. With the way I work with clay, it requires a lot of intervals when the clay has to stiffen up before the next steps. These intervals give me time to indulge in the fiber crafts. I go from cleaning fiber, to dyeing, fiber prep, spinning, knitting, and weaving. I feel doing multiple crafts enhances learning and influences how I make my pottery. And of course, it also winds up being a big source of inspiration. 

I don’t force myself to make time for crafting because I feel it would suck the joy out of it. But over the years, I have found that among fiber crafts, during the summer, I tend to dye/prep fiber and spin more. And during the winters it is more about knitting and using those yarns. But in all honesty there is always more than one knitting/spinning project going on all year round.

Q: What inspired you to start doing your own fiber prep?

I like to see the transformation of a material from its raw state to something entirely different. I know that fascinates me about clay, but it is the same with fiber. When I started spinning, I loved how the fiber changed to yarn and I was mostly buying hand dyed braids because I love color. But there were colors and textures I gravitated towards and then I discovered art batts. I was very inspired by batts made by Nicole Frost of @frostyarn on instagram and she has been a great mentor. And when it came to very textured and wild batts, I loved batts by Esther Rodgers, @jazzturtle. I loved the process of getting inspired by a picture, dyeing different fibers, making art batts to reflect the colors and textures. And then transforming them into yarn and using them knitted or woven pieces feels very gratifying.


Q: What is your favorite Strauch product? 
The Mad Batt’r is by far my favorite for the possibility of blending colors when I need a particular color that I have had trouble dyeing and also for making textured art batts. I find it as a very versatile tool.My other Strauch product I love is the Jumbo Ball Winder. I have had that for a few years; I bought it when I started spinning sweater quantities of yarn. It was so satisfying to see those big jumbo yarn cakes which showed all the work put into it.Q: How are you using Strauch products in your business?

In the past few years, I have been making a lot of art yarns and now making art batts with the Mad Batt’r as well. Since my main business is my pottery, I didn’t really think about selling anything fiber related. But over last year, with a push from my social media followers, I have started selling my art batts and yarns. So it is a start in that direction, but the process of working with these amazing tools to make art batts and yarns, is influencing some of my pottery work. I am working on some mixed media works as well and I look forward to where it takes me.

One of Charan's art batts with inspiration photo

One of Charan’s art batts with inspiration photo

Q: We love seeing your color inspiration photos and the resulting batts on Instagram. Can you tell us a little more about how you approach those projects (i.e how you choose colors and fibers to best represent the image that inspired it)?

When I look at an inspiration picture, I like to really break it down in colors and texture. Just dyeing wool and blending it in all the colors of a colorful picture can result in a very muddy batt. (Been there, done that). So I find it important to select which fiber/material is going to represent what part of the picture. I like the wool top to be in colors that are cohesive which represent the overall dominant colors of the picture. I then pick silks, angelina, silk noils, sari silk, locks to represent other highlight colors and textures.  I find that choosing different fibers doesn’t blend them all together even if they are all over the color wheel. I dye most of my fiber except for sari silks and many times blend wool on the Mad batt’r as well to get the color I want. It takes a few passes but I like the complexity of a blended wool rather than that of wool that is dyed the exact shade.


Q: Can you tell us a little more about your gorgeous pottery pieces? 

My main business is my pottery which is highly influenced by my love for the fiber crafts. I spin, knit, weave and at the back of my mind, I am always thinking, “How could I do that in clay?” I like the textures of my pottery to represent the fiber crafts. All my pottery is handbuilt and the process is very similar to how fabric is cut with templates, sewn together, buttons added, etc. I make mugs, yarn bowls and all kinds of pieces from clay, still feeling like I am working with fabric. I like the feeling of bringing the two worlds together. You can check out my work at creativewithclay.com.

As our way of supporting the fiber arts community, we’ll be featuring more talented makers here on our blog. If you use Strauch products in your creative business, we’d love to hear from you!

Like this post? Pin it!

charansacharPIN
Posted in Meet Our Makers | Leave a comment

Get Your Fiber Tools Ready for Fall!

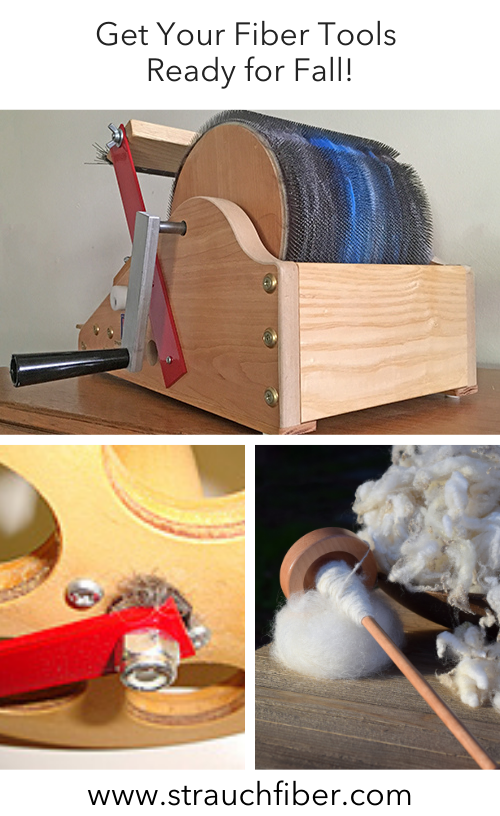
Once or twice a year, we recommend taking a close look at your fiber tools and equipment to see if anything needs a tune-up. Just a few minutes can help you spot problems before they happen, which means that your creativity doesn’t have to depend on whether or not your equipment can keep up!
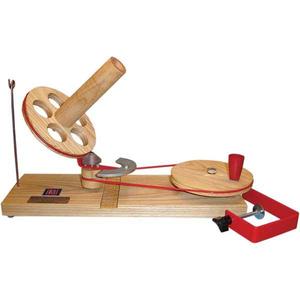
9E7088B6-22F0-417E-B6D1-52A77CBFAAD9_300x300

Jumbo Ball Winder

With our ball bearing design, NO oiling or adjustments are needed, but we do recommend a few simple tasks to keep your Jumbo Ball Winder in good working order.

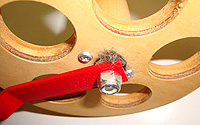
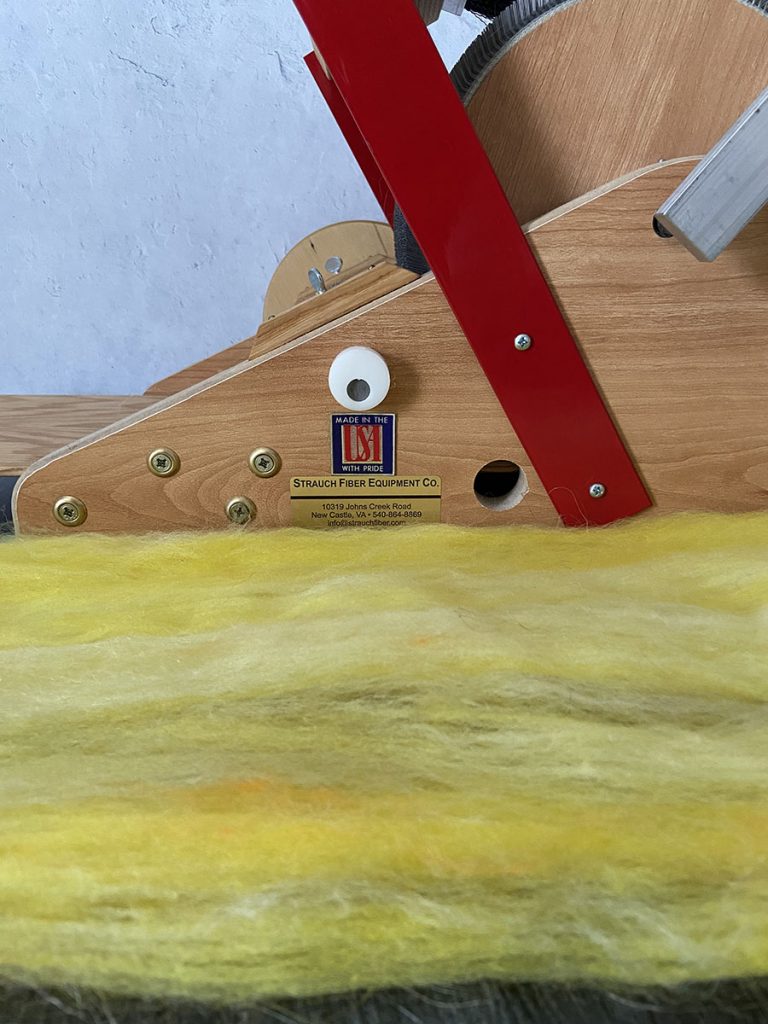
Clean any wood parts with a soft cloth. While you clean, be on the lookout for bits of fiber which may be packed around any of the moving parts of your ball winder, especially underneath the pulley. As the photo below shows, fiber pushing against the bearing will cause the winder to bind, resulting in irregularly shaped balls.

Routine-maintenance

Does your drive band need to be replaced? Over time, this band will stretch out. If it’s been a while since you’ve replaced your band (or if your balls haven’t been winding as effortlessly as they should be!), try a new band. You’ll be amazed at what a difference it can make! We’ve made it easier than ever to order replacement bands – click here for easy ordering from our new online store!

Want to make your drive band last even longer? Remove it from the machine when you are finished winding yarn rather than keeping it taut on the winder 24/7.
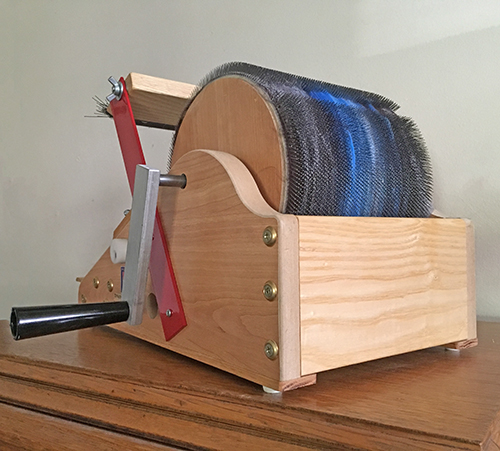
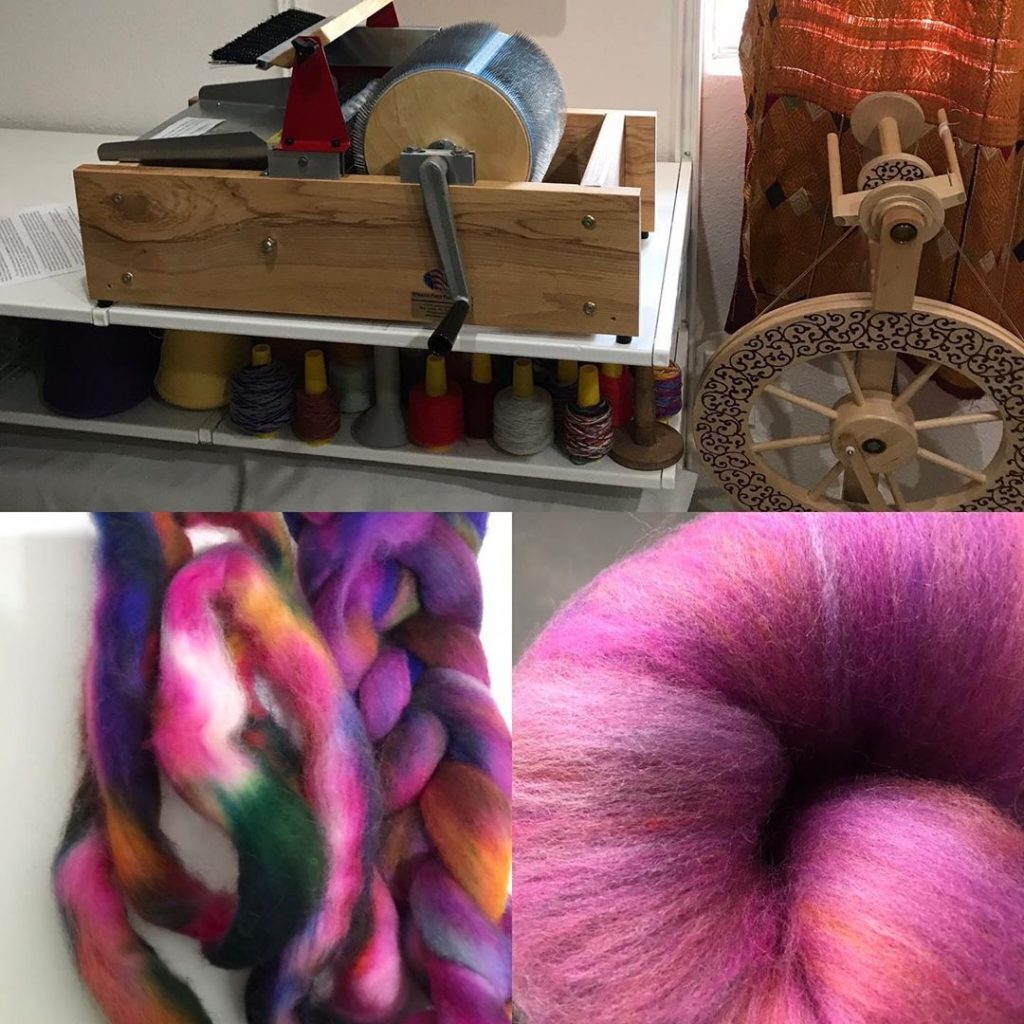
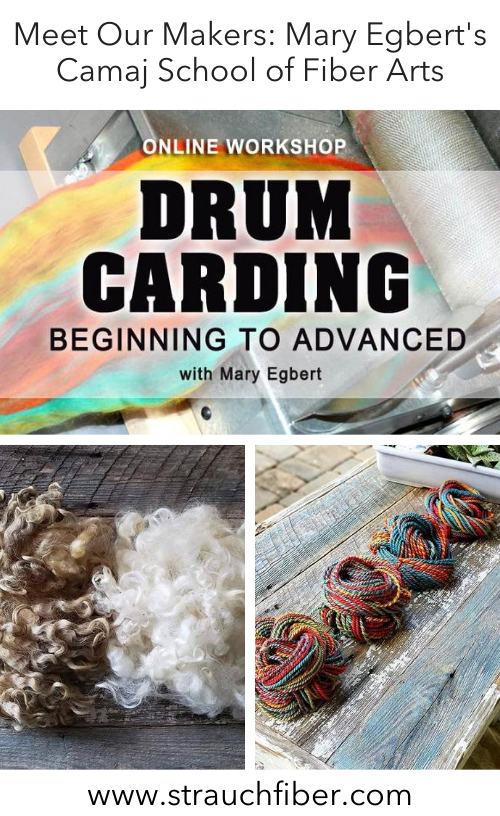
drumcarderSM

Drum Carders

In general, you won’t need to oil your drum carder (oiling, and especially over-oiling, attracts
fiber and causes build-up). Should a squeak develop with the handle, apply a drop or two of
light oil (sewing machine or 20-wt. oil will do nicely) at the point where the crank shaft meets the
small end of the black handle. If you have a chain model, NEVER oil the chain.

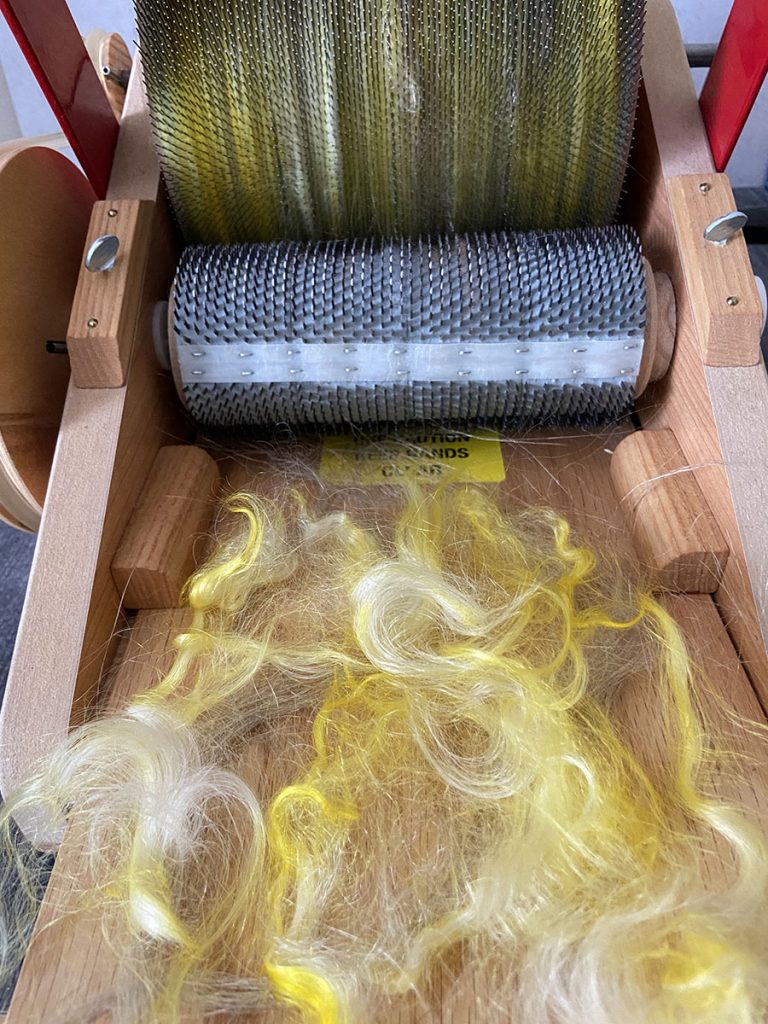
You will need to periodically clean out any accumulated fiber from each shaft where it enters the
bearings. If this is not done from time to time, you will find that your carder becomes
increasingly hard to crank.

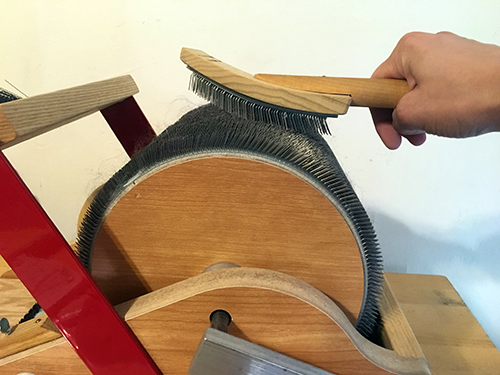
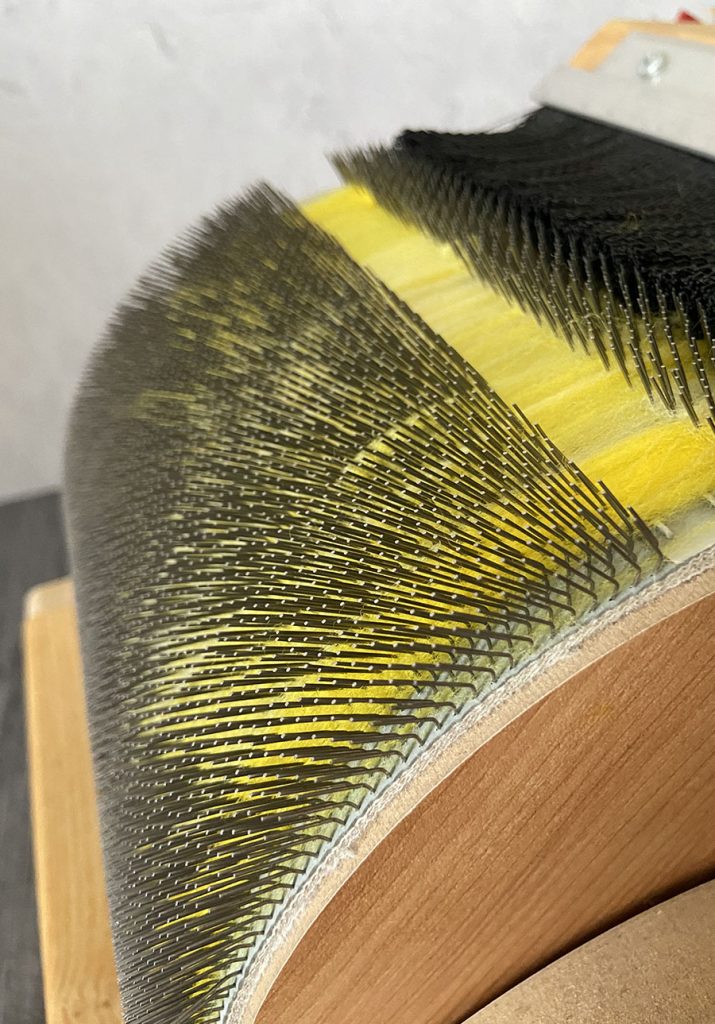
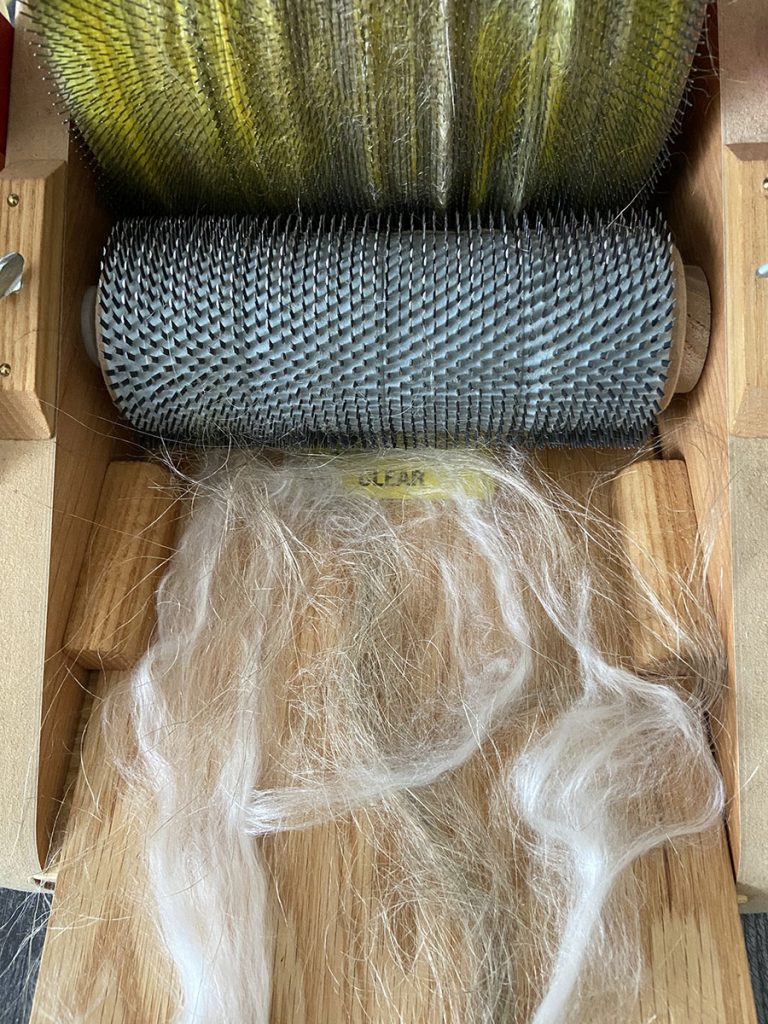
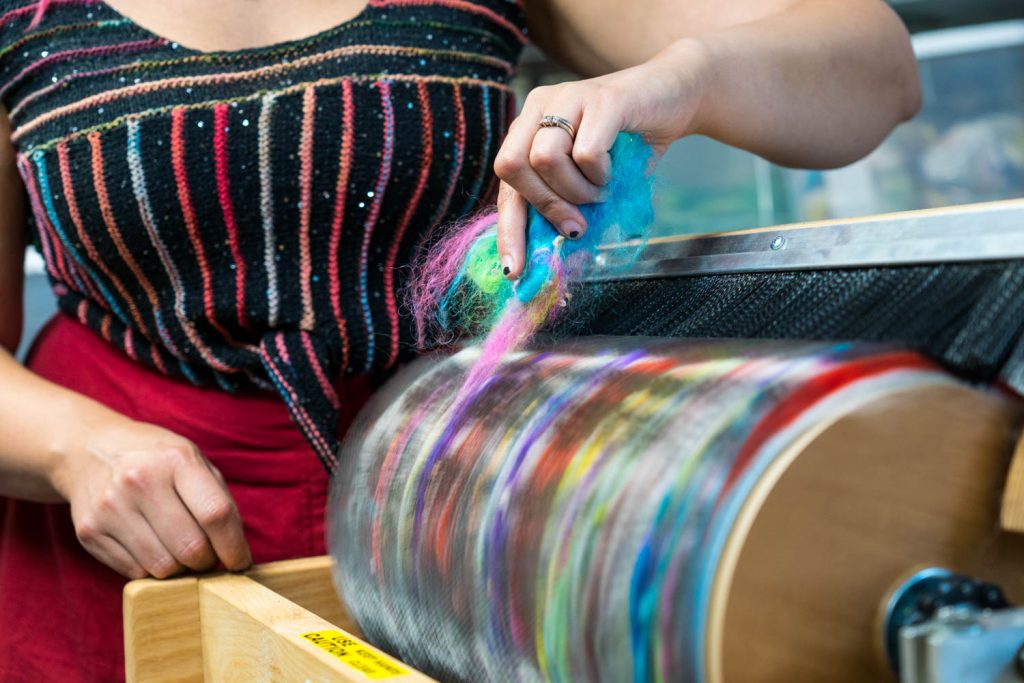
And, of course, you will need to use the Doffer/Cleaner Brush to remove residual fibers from the
carding drum when you are finished with a particular fiber or are ready to change colors. Use
the center portion of the Doffer brush to contact the curve of the large drum. Starting at the
seam, swipe the Doffer brush down the drum in the same direction as the teeth on the drum.
Continue across the width of the drum. Slowly rotate the drum backwards (counterclockwise) as
you use the brush to clean the entire drum of fiber. Do not brush across the drum since the card
cloth may become frayed.
IMG_5663sm
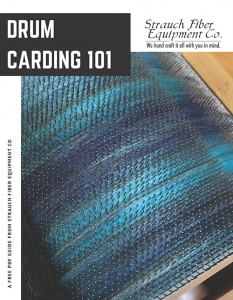
For more specific instructions for your particular model of drum carder, please refer to your operation manual (click here to download a PDF version from our site if yours has gone missing!). If you’re totally new to drum carding, check out Drum Carding 101, our free PDF guide to get you started!

Wood bowl filled with raw sheep fleece and a drop spindle wrappe

Other Equipment

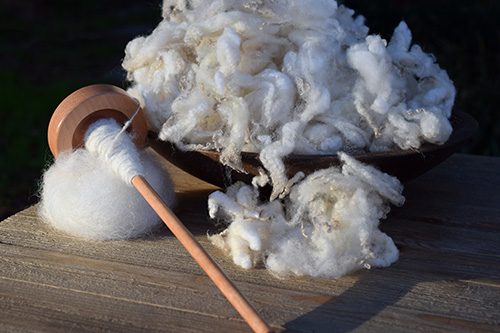
There are so many tools that fiber artists rely on, from swing pickers to hand cards, drop spindles and spinning wheels, etc. Here, we’ll speak in general terms, and recommend checking with the manufacturer or each tool for specific information on maintenance and repair.

If you have several hours to spend on your efforts, try collecting everything you use all in one place and going through piece by piece. If you are short on time, consider doing this process in stages which you space out over several days or weeks.

For each item, make sure it is clean – wipe it with a soft cloth, and use a mild soap to clean things as needed (provided your manufacturer guidelines say this is ok!). Lanolin and grease can sometimes be difficult to remove if it’s been there a while. For wood pieces (such as the handle of a hand carder), use  rubbing alcohol to wipe the affected area, taking care not to soak the wood. Just make the rag damp and briskly wipe – you may have to do this several times to dissolve the lanolin.

If there is also lanolin in the carding cloth, lightly spray some rubbing alcohol on both pads and quickly card some clean “junk wool,” which will slowly dissolve the lanolin from the pins. IMPORTANT: Do not soak the pads, this will swell the rubber backing.

Next, check any parts that move to make sure that yarn or fibers aren’t stuck in there and impinging movement. You’ll be surprised what can slowly build up over time without your notice! Gently remove anything that is stuck or wrapped around places where they don’t belong.

Finally, make sure that you are storing your tools properly! As you accrue supplies, your craft room or storage spaces may become cluttered. The better organized you can keep everything, the better – once you start shoving things into corners or piling haphazardly in bins or on shelves, accidents are more likely to happen. Make sure that everything has a place where it can be safely stored when not in use.

As you fall into fiber this autumn, we hope these tips help you keep your favorite tools in good working order. Be sure to share your projects with us on Instagram and don’t forget to tag your post with #strauchfiber!

Like this post? Pin it!

septblogPIN

Posted in Strauch Products | Tagged , , | Leave a comment

Worsted vs. Woolen Yarns: A Quick Guide for Handspinners

Do you know what kind of yarn you’re spinning? Handspun yarns (as well as commercially-spun yarns!) can be classified as worsted or woolen, which refers to the fiber preparation and how they were spun, rather than the yarn weight or fiber content. For technically-minded spinners, making the perfect woolen or worsted yarn can become an obsession, but the truth is that most spinners make hybrid yarns which could best be described as semi-worsted or semi-woolen…and that’s ok!

As long as you are happy with your resulting yarn, there is no need to be overly concerned with whether or not you are using the “right” technique to spin your yarn and how it should be described. However, knowing the difference between these two categories and how they are created can improve your overall results and give you the power to spin the yarn of your dreams!

 spinning fiber

It All Starts With Prep

The way your fiber was processed and prepared plays a huge role in the kind of yarn you’ll spin with it.

Woolen preparations add lots of air to the fibers, which are arranged in a random fashion (rather than parallel). Any carded fiber is considered a woolen prep: batts, rolags, punis or roving would be in this category.

Worsted preparations involve combing the fibers to ensure that all of the fibers are parallel. Most commercially-produced tops – even if they are described as roving by the seller – are comprised of combed fibers, and therefore worsted.

Of course, just because you are starting with fiber that is prepped for worsted or woolen spinning doesn’t limit you to the type of yarns you can spin!

Drafting Considerations

The “correct” drafting technique for worsted and woolen spinning is up for debate, but typically a long draw method will preserve airiness in woolen-prepared fibers; you can also spin off the fold (or from the fold) if you find that easier. Whatever technique you choose, make sure that twist is entering the fiber before AND after drafting – this is what traps air as you spin the fiber, giving it loft and warmth.

For worsted-prepared fibers, a short forward draft (sometimes called the inchworm method) will give you plenty of control as you spin, resulting in a worsted-spun yarn. When spinning worsted-style, the twist will be entering the fiber AFTER it has been drafted out while it is still under tension, ensuring that the fibers will remain aligned in the final yarn.

But what if you want to spin a light, airy yarn with commercially-prepared fiber? Drafting from a short foward fold when working with prepared top is a great option for adding a bit of loft and airiness to your finished yarn.

As a handspinner, you have the ultimate freedom to choose your drafting technique. Some will be easier and others more dificult, so it’s a good idea to try things out to see which ones work for you! A fabulous resource, The Joy of Handspinning, does a great job of describing these drafting techniques in greater detail here, and includes tutorial videos you can watch!

Spinning wheel bobbin filled with handspun yarn made of sheep's

Woolen, What Is It Good For?

As makers of drum carders, we’re partial to woolen-spun yarns, which are great for making lightweight yet warm sweaters, hats, scarves, mittens and more – plus, they felt beautifully!

These yarns tend to bloom when you wash them and are often quite soft and elastic; however, they do have a tendency to pill. To reduce pilling, try adding more twist to your singles or using multiple plies for the finished yarn. Fibers such as silk, bamboo or nylon can also add strength and reduce pills, although they can’t be eliminated entirely.

For Better or For Worsted

Worsted-spun yarns are known for being more durable than their woolen-spun counterparts. Because there is less air trapped in the spun fibers, the resulting yarn is dense, smooth and resistant to abrasion. As you might have guessed, most worsted-spun yarns are not ideal for felting (fibers which are all perfectly aligned are difficult to felt!). Here, durability is traded for warmth, with the added bonus of excellent stitch definition.

handspunyarn

Now that you have a better understanding of worsted and woolen yarns, we hope you will spin with confidence and experiment without fear! Be sure to share your projects with us on Instagram and don’t forget to tag your post with #strauchfiber!

Like this post? Pin it!

woolenPIN

Posted in Carding, Handspinning | Leave a comment

Meet Our Makers: Mary Egbert’s Camaj School of Fiber Arts

For years, Mary Egbert has been selling our drum carders in her online store, Camaj Fiber Arts. Recently, she launched the Camaj School of Fiber Arts, an exciting new way for fiber artists to learn at their own pace in the comfort of their own homes. Mary offers a variety of courses to master drum carding and other fiber prep skills such as wool scouring and removing vegetable matter from fibers.

This month, Mary has launched a Drum Carding Workshop for beginner to advanced drum carder users, in which she uses her trusty Strauch Mad Batt’r. Mary is offering our readers $5 off their class registration – just enter DRUM at checkout! You can watch a preview of the course in the video embedded below, then keep reading to get to know Mary in today’s interview.


Q: How did you get started in the fiber arts industry? How long has the shop been around?

A: I got started in this amazing fiber world with a starter herd of five alpacas back when I lived in Utah.  It quickly grew to 25 in a few years! I was so fascinated by their fiber and wanted to do everything there was to processing by my self. I read every book and blog I could find and watched tons of YouTube videos. Back then there were not that many fiber folks on YouTube and only a few books out on the subject and I learned by fire, trial and error. I learned to scour, dye, process and spin my alapaca fiber this way!
I started out spinning art yarns mostly because I did not have a strong fundamental spinning base and had spun over 100 skeins of yarn. That’s when I decided to do local fiber festivals and sell my yarns. Customers loved them so I continued in my fiber journey and Camaj Fiber Arts was born. My shop has been around for about 11 years and has morphed into what it is today.
Image by Mary Egbert.

Image by Mary Egbert.

Q: What is your favorite Strauch product, and why?
Ohh that’s a tough one, I love them all!  If I had to pick one, I adore the Struch Mad Batt’r drum carder. Even though it was built for art batts, it cards refined batts beautifully and it blends color amazingly well.  The licker-in cloth and the cloth on the main drum are so unique that virtually nothing sticks to either, when a batt is carded with good technique, that is.
Q: What gave you the idea to start the Camaj School of Fiber Arts?
This is an odd coincidence of a story. I have taught in person at fiber festivals the past three years and have been asked again and again to put my classes online for the many fiber lovers that were unable to travel. At the end of 2019, I decided not to travel in 2020 so I could focus on filming all the courses I have taught on the road and make them available to anyone wanting to learn. I also vowed to make the prices affordable so everyone was able to participate. Then this crazy pandemic hit and all the fiber festivals closed for 2020. My decision could not have come at a more opportune time, and the Camaj School of Fiber Arts was born!
drumcardingclass
Q: What can students who sign up for your new drum carder class expect to learn?
They will learn everything, starting with what is a drum carder used for, anatomy, safety and proper use. We will discuss what TPI is and why it matters when blending fibers. I move onto wool grades, how it impacts the finished batt and how to use wool grades in your carding decision making process.  The student will learn the correct way to prep fiber to feed into the drum without causing harm to the drum mechanisms.
We then move onto toubleshooting the dreaded nepps in batts…how to make them and how to avoid them. Another topic we cover is why fiber builds up on the licker-in drum, why it’s not a good thing and how to avoid it.
The student will learn how to blend colors correctly, make amazing art batts, how to make rolags on a drum carder, how to diz off a roving, how to remove a batt leaving almost no fiber on the main drum, how to card smooth batts from chunky wool locks and more!  I often say to new carders, if you are having issues carding it is often the cardee, not the carder. It is so important to have a good, strong foundation of carding fundamentals and technique to create the batts of your dreams.  This is what the student will walk away with when they take my new Drum Carding workshop.
Q: Is there anyone you would specifically recommend to take this class? (i.e. people who are brand new to drum carding, folks who want to level up their knowledge of fiber prep, etc.)
A: Yes!  All of them! If someone is new to drum carding this is a must! In a couple of hours this course will give them all the tools they need to start carding really well from the get-go. I’ve done all the research and years of trial and error and am here to share what I have learned.  Even someone who cards really well may take away a gem of knowledge that will take their carding to the next level.
Image by Mary Egbert.

Image by Mary Egbert.

Q: Are there any other classes you would recommend for Strauch fans?

Absolutely!  My course How to Quickly and Easily Remove Embedded Vegetable Matter and Card Pristine Batts is a must for any drum carder. Unless the carder is purchasing or growing fiber that is coated throughout the year, there will be vegetable matter in the wool. Knowing how to manage the overload with simple techniques prior to carding makes the pretties, cleanest batts. Spinning a yarn free of vegetable matter is such a delight, instead of stopping every couple of seconds to pick out hay or other earthy bits.
Of course, one should card wool that is clean and free of lanolin, that is where my scouring courses come into play. I also wrote a book on scouring called The Art of Washing Wool, Mohair and Alpaca that can help anyone that is either new to scouring or not getting consistent results with their current scouring techniques.
Image by Mary Egbert.

Image by Mary Egbert.

Then there are the specialty courses. The master carding course on advanced gradients and learning how to split up a batt multiple ways to spin unique yarns. There is also the blending the color wheel on a drum carder course starting with only three primary colors. In this course, there is a study of tints, tones and shades. These classes totally feed the creative soul and the need for color…and lots of it!
A drum carder is such a versatile piece of equipment and can be taken to places not many knew it could go. I hope this class helps people to drum card with more intention and foresight for more amazing outcomes each and every time!
Like this post? Pin it!
Meet Our Makers: Mary Egbert's Camaj School of Fiber Arts
Posted in Meet Our Makers | Tagged , , | Leave a comment

Summer Batt Experiment: Can You Card Flax Fiber?

While we firmly believe that wool is a year-round fiber (if you don’t believe us, just check out these amazing wool facts shared by Terri Laura & Julie Dennison), summer is a great time to explore non-wool fibers that you might not normally work with. Why not give one of the oldest natural fibers – flax – a spin this month?

Traditionally, flax fiber is wet-spun using a tall distaff to feed the long lengths of flax fibers, called stricks. However, it can be spun without the use of a distaff or the addition of moisture for those of you who are feeling adventurous!

And when we say that our drum carders are universal and can handle any fiber, we mean it: this month, we’ll show you how to get your feet wet with flax by blending it with wool and other fibers to create a textural layered batt that’s as irresistible as the summer sun!

blendingfibers

Supplies:

  • Strauch Drum Carder (we used a Strauch Petite)
  • Approx. 1/4 oz. yellow wool fiber for base (per batt)
  • Approx. 1/2 oz. yellow mohair dyed locks (per batt)
  • Approx. 1/2 oz  natural colored flax fiber (per batt) – we used flax from a prepared top, which had shorter fiber lengths so as to prevent getting tangled during the carding process
  • Approx. 1/4 oz undyed vegan faux cashmere fiber (per batt)

Start with your wool fiber to get a good base on your drum.

Summer Batt Experiment: Can You Card Flax Fiber?

Next, begin adding teased mohair locks and half of flax fiber mixed evenly together as you feed the fibers into your carder.

Summer Batt Experiment: Can You Card Flax Fiber?

For the final layer, mix in the vegan faux cashmere with your remaining flax fiber.

Summer Batt Experiment: Can You Card Flax Fiber?

Remove from carder & enjoy!

We can’t wait to see your own unique butterfly-inspired batts – be sure to share your projects with us on Instagram and don’t forget to tag your post with #strauchfiber! Like this post? Pin it!

We can’t wait to see your adventurous summery batts – be sure to share your projects with us on Instagram and don’t forget to tag your post with #strauchfiber!

Like this post? Pin it!

Summer Batt Experiment: Can You Card Flax Fiber?

Posted in Carding, Fiber, Inspiration | Tagged , , , | Leave a comment

Summer Fiber Fun: Solar Dyeing

If you can’t beat the heat, use it to dye yarn and fiber! Solar dyeing is an easy way to add color to yarn and fiber by harnessing the power of the sun on a hot day. Just follow these simple steps to get stunning results!

Supplies for solar dyeing yarn and fiber

Supplies:

-1 large glass jar with lid (1-2 gallons)

-Wilton Gel food Coloring (or other dye materials as preferred)

-1-2 tsp. citric acid (to set the dye)

-yarn or fiber to dye (no more than 100 g. total)


Here’s what you do:

1. Fill jar approximately 1/2 to 2/3 full with tepid water.

2. Add 1-2 tsp. of citric acid and stir to dissolve in water.

add citric acid to dye bath

3. Begin to add food coloring gel, starting with a small amount because a little goes a long way! For more complex hues, consider mixing a few different colors in your dye bath.

add dye to bath

4. Once you are happy with the color you’ve mixed, add your fiber! There is no need to pre-wet your fiber before adding to the jar – just make sure that the fiber is completely submerged in the dyebath (you may need to use a stir stick to gently encourage this to happen!).

fiber in dye bath for solar dyeing

5. Close the lid on the jar and set in a sunny spot for 1-2 days until dye bath exhausts (you will know this happens when the dye bath is nearly clear, which means that all of the color has been transferred to your yarns or fibers). If you prefer a more uniform color, make sure to gently stir your yarns or fibers periodically. If you would like to achieve a more variegated color, there is no need to stir!

yarn and fiber dyeing using the summer sun

6. Gently remove yarn or fiber from the jar. Note: If you are not sure that the dye has fully exhausted, make sure to wear gloves or use tongs to prevent dye from transferring to your bare hands.

removing fiber from dye bath

7. Roll fiber in a clean towel to squeeze out excess water.

squeeze out excess water using an old towel

8. Lay flat to dry before carding or spinning!

solar dyed fiber drying next to exhausted dye bath

Make sure to share your fiber dyeing adventures with us on social media using #strauchfiber in your posts!

Like this post? Pin it!

Summer Fiber Fun: Solar Dyeing Fiber

Posted in Dyeing, Tutorial | Tagged , , | Leave a comment

Meet Our Makers: Classy Squid Fiber Co.

12339649_10100437138852533_9001039510766193817_o_largeSince most fiber festivals and events are on hold for the time being, we’re delighted when folks tag us on social media to let us know how they’re enjoying their Strauch products.

When we saw that Amanda from the Classy Squid Fiber Co recently purchased a motorized Mad Batt’r for her small business, we reached out to see if she’d like to be featured here on our blog. We love Amanda’s focus on natural fibers from a breadth of sheep breeds, camelids, and other fiber-producing animals – in fact, each batt never contains less than 50% animal fibers. The Classy Squid online shop is filled with all kinds of tantalizing batts, rolags and fibers, and you can follow her on Instagram @ClassySquidFiberCo for even more fibery inspiration.

We hope you enjoy getting to know Amanda in today’s interview!

Q: How did you get started? What drew you to the fiber arts business? 

A: I’m enamoured of the idea of being able to do something completely from end to end. I tried to do this with my schooling, attempting a double-major in college with Computer Science and Electrical Engineering, but these are both enormous disciplines and I couldn’t connect the dots from electrons all the way to computers and programs the way I wanted to. I’d been knitting and crocheting for a long time by that point, so learning how to make yarn, and finally how to process fiber straight from the animal seemed like a perfect way to get that end-to-end understanding I craved so badly. As soon as I held my first drop spindle and bundle of wool, everything clicked into place and I was hooked for life. 

As I started getting into spinning, I felt like spinners (vs those who work with already-spun yarn) were really underserved. Fiber artists I loved were constantly moving out of fiber to either close completely or go to only dyeing yarn, and if you wanted to plan a project like a sweater it was really hard to find a brand with interesting dyed fiber and blends in sufficient quantity. So I set out to build a business that was designed from the beginning to be long-lasting. Classy Squid Fiber Co turned 5 this year, with a crew that consists of 2 part-time employees, myself, and my husband (who designed and builds parts for our aluminum spindles). My dream is to expand even further, and someday make batts and rolags, not just combed top, something you can reliably find in local yarn shops across the country. 

88200678_212194959928184_1972371605099261485_n

Q: What are your favorite fiber(s) to work with, and why? 

A: Wooly, non-superwash sheep’s wool is my absolute favorite. It has spring, life, and character to it that superwash merino can’t hold a candle to. 

The first batt I purchased and spun was beautiful, but hung limp and lifeless as a yarn. I didn’t love it, and I was fascinated to find out *why*. That journey led me to many experiments and formulas, and the realization that I don’t love superwash (especially merino), and including silk or synthetics above a certain percentage change the overall hand of the material in a way that doesn’t appeal to me. The hallmark of Classy Squid batts is that, while including texture and sparkle and color, they should spin like wool, knit like wool, and wear like wool. We call it “true to the sheep”. Most of our art batts are of the “gentle” variety, which means the texture is small and distributed, and spun yarns will be complex and interesting but also wearable in garments or other large products. We want to encourage spinners to use their gorgeous handspun and wear it with pride. 

Meet Our Makers: Amanda from Classy Squid Fiber Co. using a Strauch Mad Batt'r

Q: What is the best advice you’ve ever gotten about fiber preparation in general (or, if you want to be specific, making batts!)

A: Experiment, and track what you are doing! There is so much variation possible, and with a few exceptions the “right way” to do something will depend on your end goal. I love really wooly preparations, complex tweeds, and subtle texture, and I’ve figured out percentages and recipes that work for me and my customers. Others may want to perfect pure 100% wool preparations starting from fleece with no nepps or noils, or they may want crazy texture, or out of this world sparkle and shine. 

Q: Tell us about your Mad Batt’r! Do you use any other Strauch products?

A: The motorized Mad Batt’r Doublewide is my first, but I don’t think it will be the last! This is the third carder I’ve purchased for my business, and it is absolutely in a league of its own!

Things that really set it apart from other carders include:

  • The licker-in is MAGIC. I cannot calculate how much time I used to have to spend wrangling the fibers that were all trapped on other licker-ins, even when I would paint most of the texture add-ins over the top of the main drum. This doesn’t clog up, and you can even feed texture elements like yarn scraps or silk noil or nepps through it: besides not tangling on them, it distributes those texture elements across the surface of the batt in the most amazing way. This is not only great for making the batt look good on its own, it also means the texture is trapped together with the longer fibers more securely, so it’s less likely to fall out onto your lap as you spin.
  • The chain drive is a major improvement over belt-driven systems, especially for textured batts or when working with farm wools. My other carders would slip and lose traction all the time. There are a lot of things to pay attention to when you’re carding with fine fibers, and the fact that this machine will just keep going no matter what means I can spend less time focused on whether the machine is behaving, and more on how the fiber is processing.
  • The Mad Batt’r makes a much more lofty batt than I was used to, which is fantastic for producing airy woolen yarns, which are what batts and rolags are all about!

DSC05871

Get to know more of our makers – click here to read more profiles from our blog archive!

Do you use Strauch tools in your craft business? We’d love to hear from you! Email info@strauchfiber.com to hare your story with us, or share on social media using the #strauchfiber hashtag.

Like this post? Pin it! 

Meet Our Makers: Classy Squid Fiber Co.

Posted in Meet Our Makers | Leave a comment

Which Strauch Drum Carder is Right For You?

Choosing a drum carder is a big decision, but not all carders can handle everything you need it to do (and more!). We believe that preparing fibers for spinning and felting projects should be an enjoyable task – not just something you have to do to get to the “fun” part. In our free guide, Drum Carding 101, we walk you Drum Carding 101: A Free Guide to Choosing & Using a Strauch Drum Carderthrough this process with questions such as:

● What kinds of fibers do I want to card?

● What kinds of batts do I want to make?

● How much space do I have for both usage and storage?

● Will I need to take my carder to classes or events?

● What is my budget?

Answers may differ from person to person, and if you’re totally new to carding, the answer to these questions may be, “I have no idea!” The good news is that there are no wrong answers here, and the even better news is there are some tried-and-true recommendations we can easily make: For instance, if you are all about making art batts, the Mad Batt’r is undeniably the way to go. Need to process a lot of fleece or fiber? Get yourself a Double Wide Finest or Mad Batt’r to make thick & luscious batts. Have arthritis or repetitive use injuries, or just want to process more fleece, faster? A motorized option reduces processing time by up to 25% while also freeing up both hands, making it easier for you to control the type of art batt you are making (on the Mad Batt’r) and also helps control shorter, finer fibers as you card (on the Finest).

We’ve also created a few helpful charts to supplement our free guide so that you can visualize what each of our flagship models are capable of.

First, we are often asked how much fiber any given machine can handle. While the answer is ultimately subjective (based on fiber type, thickness, density, how the brush attachment is used, etc.), we have made conservative guesstimates based on our own experience:

How much fiber can a strauch drum carder hold?

If you have a preference on batt size, here’s a handy visual on the three sizes that can be made with our  drum carders:

what size batt can i make on a strauch drum carder?

Last but not least, for those of you who want to save a little time, here’s how each model stacks up when playing “beat the clock”:

How long does it take to fill the drum?

Don’t forget to click here for your free download of Drum Carding 101 for more tips on choosing & using the right carder for you!

Like this post? Pin it!

Which Strauch Drum Carder is Right For You?

Posted in Carding, Strauch Products | Tagged , | Leave a comment